Steps to Manage User Permissions
The following section outlines how user permissions are managed.
- Lock User: Lock an active account. This option prevents users from logging in to the CapturePoint system when they leave the company.
- Activate/Reset Password: Unlock a locked local user account.
- Unlock SSO Account: Unlock a locked SSO user account.
- Remove User: Use this option to delete the user account from a user group when it needs to be moved to another group.
- Make Admin: This option grants the user account admin privileges, allowing access to all profile configuration settings.
- Remove Admin Permission: Use this to revoke admin privileges from the user account.
- Make User Mgmt. Admin: Grant the user account User Management Admin privileges to manage user accounts, including adding or removing user accounts.
- Remove User Mgmt. Admin: Revoke User Management Admin privileges from the user account.
- Make License Mgmt. Admin: Grant the user account License Management Admin privileges to access admin tools for viewing profile information.
- Remove License Mgmt. Admin: Revoke License Management Admin privileges from the user account.
- Show Effective Access: Work in progress.
- Reset MFA: Work in progress.
The steps are below
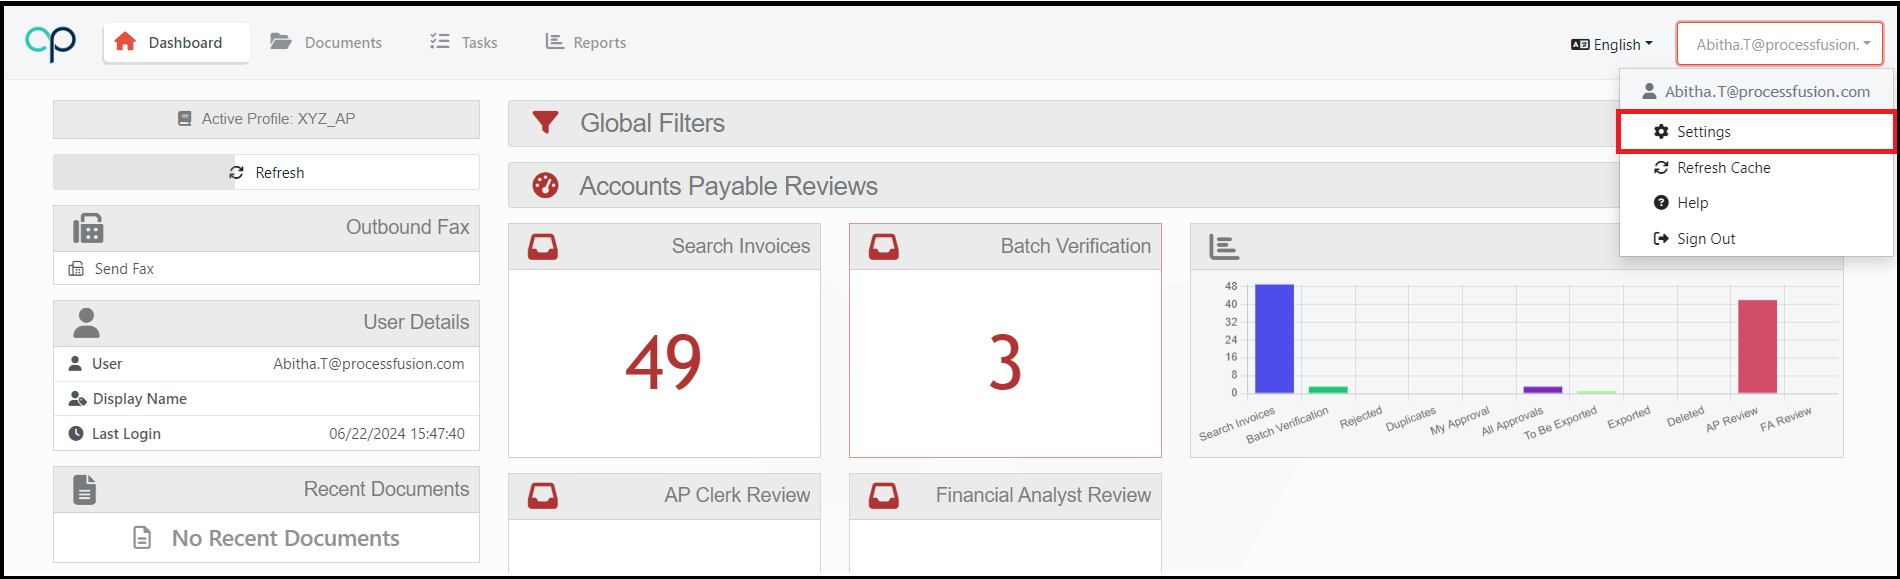
- Click “Settings” from the Dashboard to access the settings page.
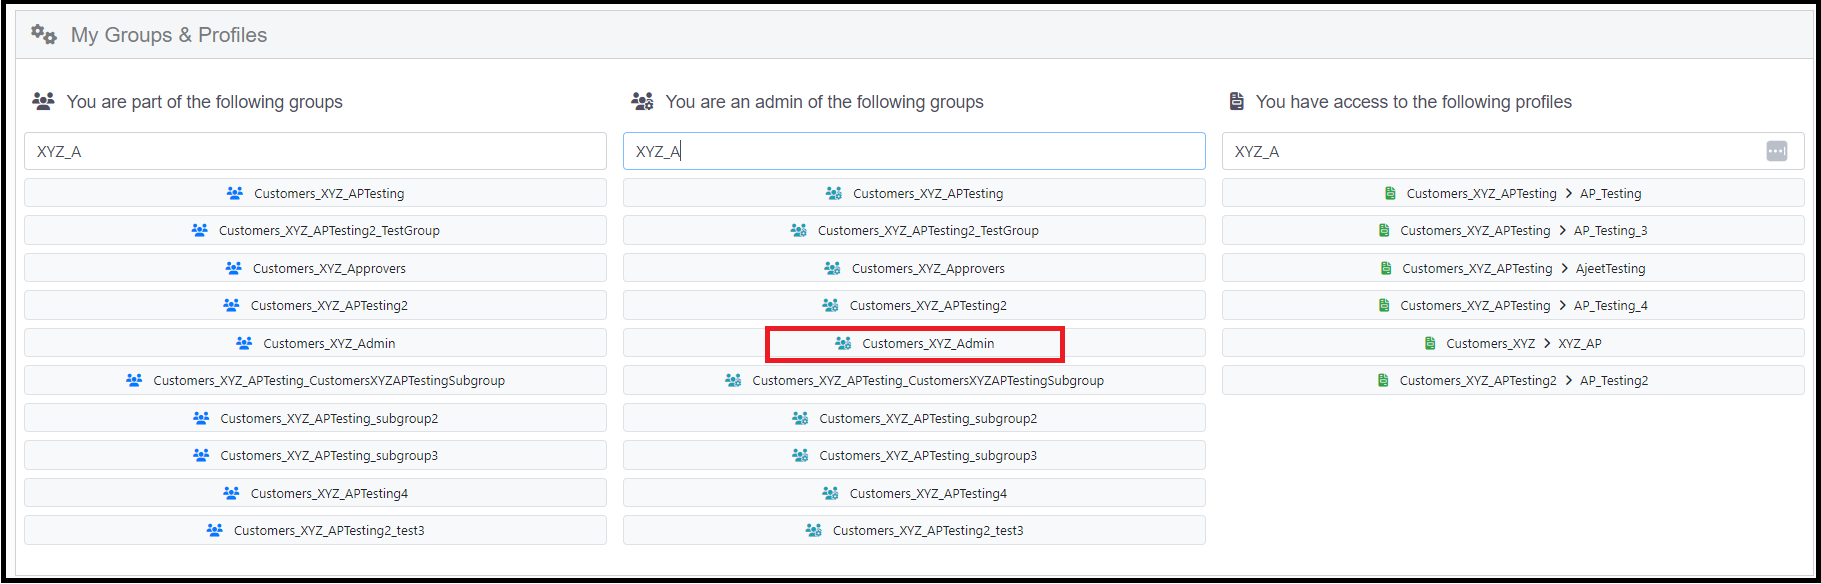
2. On the Profile settings page, select the specific group the user belongs to.
5. On the Group & User Management section Click on the “Users” tab.
6. Click on the three vertical dots next to the user’s email address, and the user management window prompts the user.
7. Select the option from the list that meets your requirements.
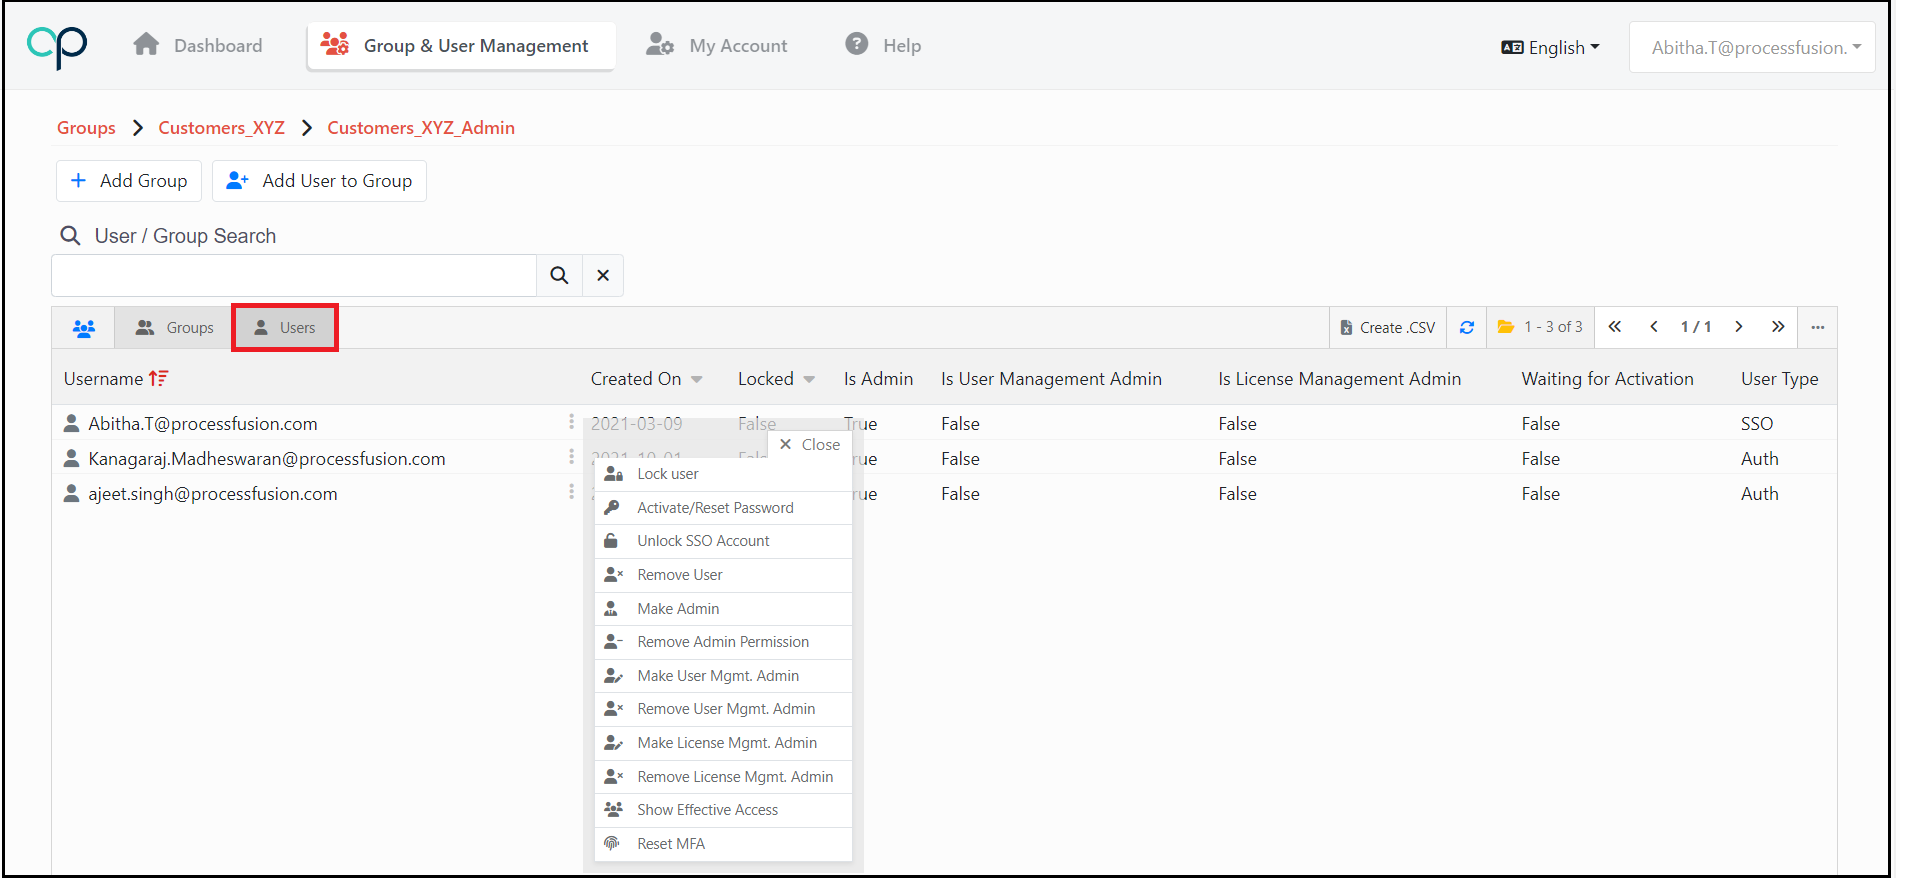
The grid columns display the user account status with True or False values.